Life is short. live it the way you want it. and remember, friends are everywhere if you need an ear.
- dedicated to my best friend Shane who lost his father today. i wish there was more i could do for you Shane.
If there is any way you could read this Mr Lee, i want you to know that we will always think of you. The first time, you really scared me with your seriousness. after that, you opened up and welcomed me like part of the family. though i didnt know you long, i will miss you.
:'(
By Vy

Saturday, February 26, 2011
Safety and Shit
These couple of months, a lot of issues have been bothering me about biking. A good friend of mine had a very bad accident, lost his upper lip and fractured some bones. Then another friend was pretty banged up as well and almost got his "pretty" mug dragged on the floor. Also, yesterday there was a video I saw on Farcebuk of a bad accident.
All this got me thinking about writing this article about biking safety and what the hell to do during an emergency. I will start with what to do first as its shorter.
SHIT TO DO
What to do to avoid accidents or actions to remember when you are almost getting into one:
Bring your BRAIN:
If you are sleepy, don't ride. If you are deep in thought, don't ride. If you had a fight with your lady friend, don't ride. To make a long story short, its not like driving a car, you MUST concentrate. Your brain needs to balance the bike, shift the gears, keep you safe and enjoy yourself in the process. It aint easy
Say OH FUCK ME! Not again!!:
Well, this is something I actually encountered. It seems when you fall a lot, things slow down and you have time to utter these words. But anyway. Try to avoid this at all costs.
MOVE!!:
The body has a great way of slowing down time, in an impending accident, things slow down. But gives you one opportunity to make a choice before its too late (i.e: hit the curb or go under the truck.. choose d curb). When you realize that an accident is imminent, look for alternative solutions. This is regards to impact btw. Meaning, if you are gonna hit a car, look for anyway to NOT fall if possible or if you have no choice, plow into the grass or something. Its better. Trust me.
Bugs:
Now you may laugh while reading this, but it won't be funny when you experience it. If your bike is in storage a lot, bugs WILL grow and thrive on your bike. Especially since nature has an odd sense of humour that the bugs that will thrive on it will be the bugs you are most afraid off, be it ants, roaches or spiders. If you don't ride much, spray down your bike with bug spray at least once a week. If you ride your bike often, avoid parking near any outgrowth or under fuzzy trees. I have dumped it taking a very sharp spiraling corner going at 120-140KMH because a spider was walking across my handlebars so this is serious. I dislocated thumbs and got scraped up badly before.
The Stomp:
I learnt doing this when I started learning wheelies from my mechanic friend a long time ago. I found that it works while riding too. While wheelie-ing, you might find yourself losing balance. Noobs will put a leg down to stomp it back to stability and if you were wearing sandals (like me) probably lose a toenail or 4. The concept of "the stomp" is the same as when wheelieing. Sometimes (especially for me now riding my friends borrowed crotch rocket), while taking a turn on slippery, damp, sandy or uneven roads (point is when your tail gives way and u look like a scene in Tokyo drift), barely tap (key word: TAP) your front and back brakes to anything under 60( anything over 60 done by noobs with break your leg, shatter your ankle or throw out your knee caps), with your knees bent, and toes pointing up, stomp your heels down to the tar road to lift your bike straight and stabilize. Takes some experience and you foot to your ass will hurt like hell for a week, at least you wont fall.
SAFETY GEAR
Gloves:
These are a must for every rider, regardless if you are riding an underbone, superbike or chopper. This is because the first thing that goes are your fingers. Why? Simple, when falling, what is the first thing you do? Use your hands to protect your ugly face. Why? I don't know but you cant change it. I recommend buying really padded gloves if you don't like racing gloves. Leather is always good, but some textile ones have foam paddings. Make sure you get gloves that cover your fingers and if possible, buy a long gauntlet type for extra protection. If you are opting for full race gloves, here is what I recommend looking for: a close fit (not too loose not too tight), sliders on the top side of your fingers (you will thank me later), knuckle protection (carbon fiber recommended), coz this is where it hurts d most. Rawhide leather. If possible, (in new designs nowadays) get the ones with the slider on the bottom of your palm.
Shoes:
When riding, always wear shoes. It is always recommended that you wear shoes that at least cover all the way up your waist.. haha.. jokin.. I mean at least up to cover your ankle. Why? When you call, your ankle will be facing out and since it sticks out, the floor will help you shave it down. The other reason one should wear shoes while riding is because if you do fall, the chances of your toes flying in different directions without you are quite high. Unfortunately for me, I had the "honour" of seeing that happen while having dinner with some colleagues a long time ago. Was not cool.
Elbow guards:
Elbow guards are known to look "stupid" around here but are actually very important for bikers. Why? Well, same concept with the reason for wearing gloves, you will stick your hands up to protect your face. This means that one of the impact points will be your elbow. And a bone there will always break near your elbow.. I think its called the radius bone. Now.. for the reason its called stoopid… people here call it stupid because they wear it ON their jackets. Why? Simple. Because they want to protect the damn jacket too. Well.. the stupid one is d idiot that does that. If you don't want to look like a moron, wear it under your textile jacket.
Knee Guards:
These are not to important (in my opinion), because unless you are flying off your bike, your knees will usually be trapped under the bike anyway. But, I wouldn't advise against it. Any extra protection would be a good idea. People who ride choppers should also wear them because for a heavy tank to smack into your knee doesn't do you much good. On this note, also try wearing baggier jeans to avoid road rash.
Back protector:
Back protectors help with all sorts of things. They act as a back brace while riding (if you have a bad back like me) and protects you if there is any impact to your back. Good addition if you ride long distance.
Body Armour:
Body armour comes in 2 types, upper and lower body armour. Technically, upper body armour consists of frontal protection, back brace, shoulder pads and elbow pads. Generally its an all in one thing (elbow, back protector) with the addition of the front chest protection and shoulder pads. Most people wont wear it as it takes forever to put it on and remove it. The lower body armour usually consists of knee guards and some paddings on the ass (for those that I see) and looks like biker tights.
Jackets:
If you hate body armour and find that all the extra parts are annoying, then get your self a biker jacket. They are usually water proof and come in Cordura mesh or leather. These will usually come with certified CE paddings for your back, shoulder and elbow for fall protection (other then the fact that they look cool). They also keep you warm when its cold, looks great when you are riding, and protects you when you fall.
I am sure most of you would go "hey, you forgot helmets" well, all I can say about those are: if you can think about them already, you know about them, why waste my time about these mandatory things (in Malaysia anyway)
By Vy
Tuesday, February 22, 2011
Bodywork
The bodywork was an interesting design. I had wanted the rear swingarm to be extended so that the rear tyre would stick out halfway through the fender. After some sketches and ideas tossed around, we had agreed on a "brace" design. Sort of like those found on a sports bike. Sometime later, Ray, who was still worrying about the reliability of the swingarm somehow found a way to make it look good and also make it stable. He had brought the swingarm to a CNC shop to get the extensions machined. These machined parts will not only be the extension, but there are thinner sections that slide into the existing swingarm so that it is reliable and can support the extra extension. The swingarm is then welded and the suspension points are then relocated.
The original tank has been removed and replaced with a reversed sportsbike tank. I personally like that tank because when flipped backwards, it actually resemble a Frisco tank. It has a fuel float in the tank but unfortunately it (or the fuel gauge) is not working. So I cant use it which is quite risky due to the fact that I wont know how much fuel I have left.
Unfortunately, the welding of MODENAS is very untidy and looks horrid. Since I am leaving the rear section that holds the fender in place uncovered (there used to be this cheap chromed plastic crap), we will have to do something about it. Hopefully the mechanic will be shaving it off or remembers (like what he said) that he is supposed to fill it all up with bondo.
About the wheels, we had to look for another rear wheel shaft as the original that came with the bike was too short. The problem with these are, for every brand, there is a different length and thickness of the shaft. For the original bike, the shaft was too thin and for the bike that previously own the rims, the shaft is too short. So where do I locate a shaft that is thick enough and long enough?
There are 2 ways to go about this.
The hard but not too expensive way: ask every shop or spare parts place you can find for it with a sample of the correct thickness.
The easy but expensive way: Just get the sample to a CnC shop, pay a hefty sum to get it custom made. Oh did I mention that it will take some weeks?
Well.. I did it the hard but less expensive way first… I scouted around many many shops in my area just to look for it… there wasn't a single one. Then, finally, giving up and telling the mechanic and Ray that they would have to make one for me, I went to the bike shop near my house (which I didn't bother going in the first place) to buy all the other junk that the mechanic wanted including another carb (will explain later). As I was about to leave after ordering my stuff (they didn't have some things), I decided to try asking the owner. Him knowing me for so long (since I moved here like some years ago), let me rummage through his store looking and comparing shafts (actually even he and his head mechanic were looking). It was like looking for a damn needle in a bunch of OTHER needles… finally, we found one of the right thickness that was quite long… acting like we found a gold nugget the size of Texas, we quickly ran to the front holding it like MY PRECIOUS…. We broke out the measuring tape to measure it (this is the point where I tell you the length we wanted was 14 inches) we measured it, then again, not believing that it was 1 inch shorter then what we needed, we each measured again each one doing it once and took a poll on who got it right (kinda stupid coz all 3 of us got 13 inches). I picked up the phone and rang the mechanic telling him the almost good news. He however insisted that he MUST have 14 inches. All 3 of us frowned in disappointment. I almost stooped so low as to thinking if I rub it and sway it around it might grow (you know what I meant). I laughed to myself and just confirmed the rest of the things to order and left. The next day, I came to pick up the stuff I ordered, an aching feeling told me to take that shaft we found anyway, just to try it out. I asked the owner if I could borrow it, just for awhile, if it doesn't fit I will bring it back. And he said ok. I took the shaft and all the things he needed me to buy and I rode to my mechanics place on a loaned bike (takes about an hour to get from my place to the mechanics place). When I reached his place, he was away at his day job, so I left the parts. I just took up the shaft and placed it between the spokes to my rims to see if it fits.. lo and behold, it was a perfect fit. I quickly went back and paid the guy. Problem solved.
Back to the carburetor, this beast of a carb was previously sitting the d chest cavity of my 150cc racing bike (Yamaha TZM). Based on the size of it, its definitely NOT made for a 150c bike. I love that thing, so, since my bike was in pieces, I decided to want to put it into my chopper. The other day, we were trying to fit the carb (as the intake assembly for the carb just arrived coz my old carb got stolen), we fount that the beast is so damn big it doesn't fit properly. Cracking my head for solutions and having all of them thrown out, I was then suggested by Ray to temporarily install an RXZ carb which is built for a 135 cc bike. Having not much choice and the bike being delayed for so long (will blog about that later), I went ahead and bought the carb. Whatever that makes the bike come out is good for me. Speaking of carbs, a friend of mine who is quite close recently had a bad accident. He had just modded his moped but decided after the accident that he wont be riding anymore. He has a racing carb as well and recently just told me that he will give it to me.. yes.. so in total I now have 3 carbs. Good for me for future use.
Here comes the story about the battery box. Earlier on, I had discussed with the mechanic on the creation of a battery box (as the standard one is just a plastic cover and stuff. Didn't really like that) then later on as the complications and delay of the build happened, apparently he wanted to "discuss" about how the battery box would be built. In the end, I had decided that since I will be using a different carb, I wont be using the air box (which is right next to the batt box.) so we ended up hollowing it out to use to store stuff. I will probably do something about that later on.
As for the rest of the things, either I will be adding it in later or something. I already cant wait to ride my bike so I will figure that out later on.
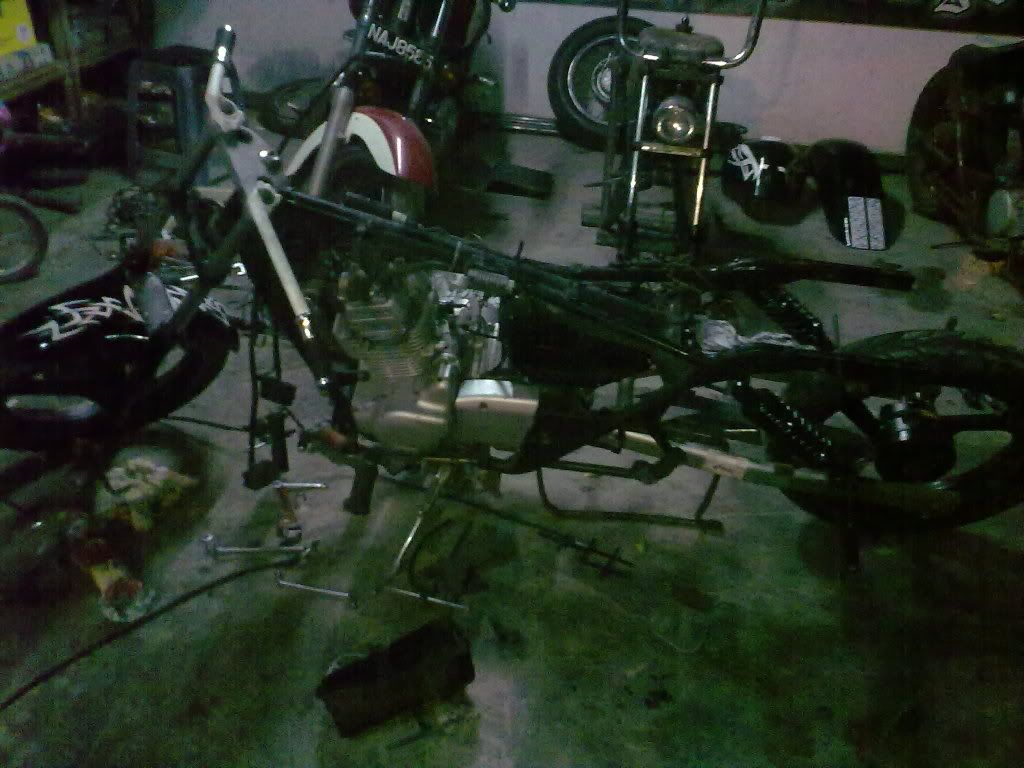 Le Carcass
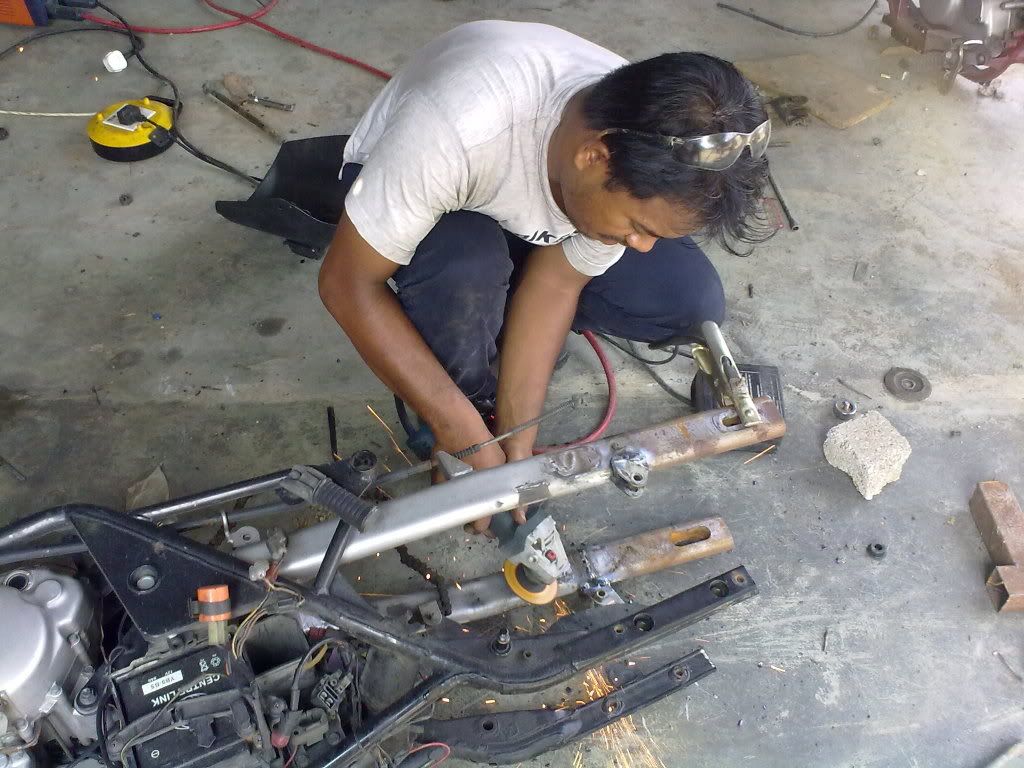 Alip Grinding Down D Ext Swingarm
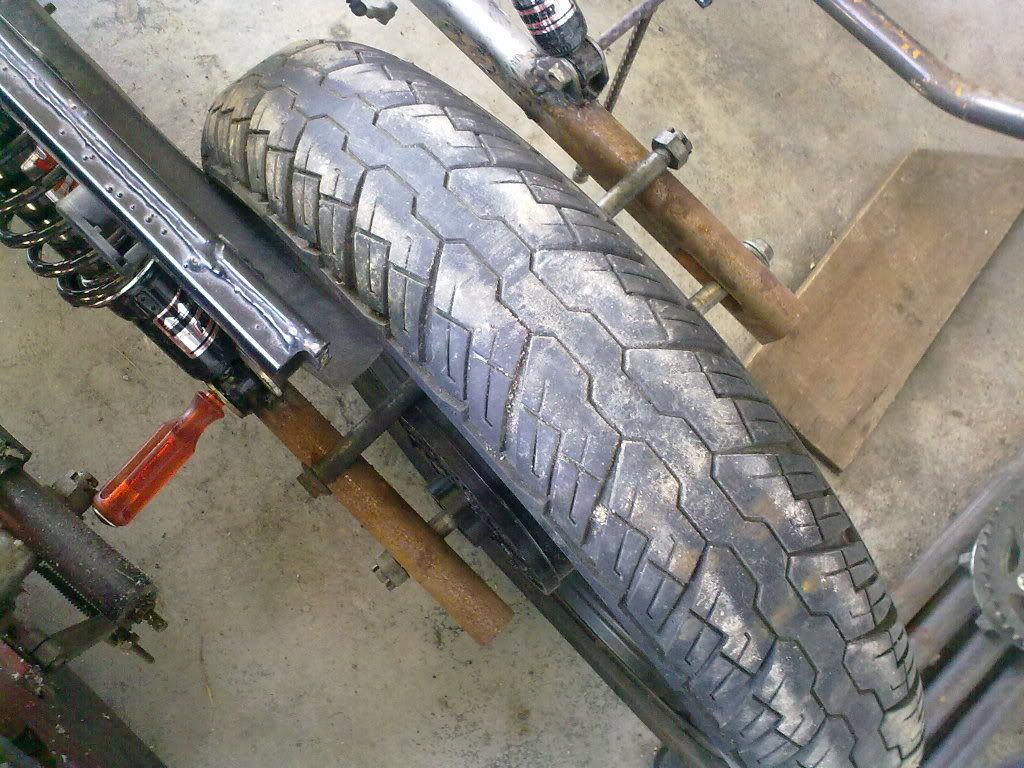 The Shaft I Found
By Vy
The original tank has been removed and replaced with a reversed sportsbike tank. I personally like that tank because when flipped backwards, it actually resemble a Frisco tank. It has a fuel float in the tank but unfortunately it (or the fuel gauge) is not working. So I cant use it which is quite risky due to the fact that I wont know how much fuel I have left.
Unfortunately, the welding of MODENAS is very untidy and looks horrid. Since I am leaving the rear section that holds the fender in place uncovered (there used to be this cheap chromed plastic crap), we will have to do something about it. Hopefully the mechanic will be shaving it off or remembers (like what he said) that he is supposed to fill it all up with bondo.
About the wheels, we had to look for another rear wheel shaft as the original that came with the bike was too short. The problem with these are, for every brand, there is a different length and thickness of the shaft. For the original bike, the shaft was too thin and for the bike that previously own the rims, the shaft is too short. So where do I locate a shaft that is thick enough and long enough?
There are 2 ways to go about this.
The hard but not too expensive way: ask every shop or spare parts place you can find for it with a sample of the correct thickness.
The easy but expensive way: Just get the sample to a CnC shop, pay a hefty sum to get it custom made. Oh did I mention that it will take some weeks?
Well.. I did it the hard but less expensive way first… I scouted around many many shops in my area just to look for it… there wasn't a single one. Then, finally, giving up and telling the mechanic and Ray that they would have to make one for me, I went to the bike shop near my house (which I didn't bother going in the first place) to buy all the other junk that the mechanic wanted including another carb (will explain later). As I was about to leave after ordering my stuff (they didn't have some things), I decided to try asking the owner. Him knowing me for so long (since I moved here like some years ago), let me rummage through his store looking and comparing shafts (actually even he and his head mechanic were looking). It was like looking for a damn needle in a bunch of OTHER needles… finally, we found one of the right thickness that was quite long… acting like we found a gold nugget the size of Texas, we quickly ran to the front holding it like MY PRECIOUS…. We broke out the measuring tape to measure it (this is the point where I tell you the length we wanted was 14 inches) we measured it, then again, not believing that it was 1 inch shorter then what we needed, we each measured again each one doing it once and took a poll on who got it right (kinda stupid coz all 3 of us got 13 inches). I picked up the phone and rang the mechanic telling him the almost good news. He however insisted that he MUST have 14 inches. All 3 of us frowned in disappointment. I almost stooped so low as to thinking if I rub it and sway it around it might grow (you know what I meant). I laughed to myself and just confirmed the rest of the things to order and left. The next day, I came to pick up the stuff I ordered, an aching feeling told me to take that shaft we found anyway, just to try it out. I asked the owner if I could borrow it, just for awhile, if it doesn't fit I will bring it back. And he said ok. I took the shaft and all the things he needed me to buy and I rode to my mechanics place on a loaned bike (takes about an hour to get from my place to the mechanics place). When I reached his place, he was away at his day job, so I left the parts. I just took up the shaft and placed it between the spokes to my rims to see if it fits.. lo and behold, it was a perfect fit. I quickly went back and paid the guy. Problem solved.
Back to the carburetor, this beast of a carb was previously sitting the d chest cavity of my 150cc racing bike (Yamaha TZM). Based on the size of it, its definitely NOT made for a 150c bike. I love that thing, so, since my bike was in pieces, I decided to want to put it into my chopper. The other day, we were trying to fit the carb (as the intake assembly for the carb just arrived coz my old carb got stolen), we fount that the beast is so damn big it doesn't fit properly. Cracking my head for solutions and having all of them thrown out, I was then suggested by Ray to temporarily install an RXZ carb which is built for a 135 cc bike. Having not much choice and the bike being delayed for so long (will blog about that later), I went ahead and bought the carb. Whatever that makes the bike come out is good for me. Speaking of carbs, a friend of mine who is quite close recently had a bad accident. He had just modded his moped but decided after the accident that he wont be riding anymore. He has a racing carb as well and recently just told me that he will give it to me.. yes.. so in total I now have 3 carbs. Good for me for future use.
Here comes the story about the battery box. Earlier on, I had discussed with the mechanic on the creation of a battery box (as the standard one is just a plastic cover and stuff. Didn't really like that) then later on as the complications and delay of the build happened, apparently he wanted to "discuss" about how the battery box would be built. In the end, I had decided that since I will be using a different carb, I wont be using the air box (which is right next to the batt box.) so we ended up hollowing it out to use to store stuff. I will probably do something about that later on.
As for the rest of the things, either I will be adding it in later or something. I already cant wait to ride my bike so I will figure that out later on.
Le CarcassAlip Grinding Down D Ext SwingarmThe Shaft I FoundBy Vy
Thursday, February 17, 2011
Brief
So it was October 2010, I cant really remember the date but it was a very hot weekend. We had arranged to bring some stuff in a rented truck and some hired muscle to my best friends house and back. We also decided to get the guys to send my bike over to Alips place. From there, we started having talks about how I wanted it done up and what not. After which, Rays brother had drawn up the initial sketch of the bike. If you refer to the picture, you will notice that the bikes extended swingarm would be reinforced with a bar, but they had later changed the design to strengthen the swingarm and make it neat. They had just CnC-ed the extension to slide right into the existing one thus making it longer.
The Playground Car
 The Tank
 The Rear Fender (My Pride And Joy)
By Vy
Anyway, several hours of chatting and designing and listing down what needed to be done, we were on our way creating the bike. All the parts that were needed for paint was removed and taken back to my apartment for paint works. Sadly, because it was an apartment, things were slow and cramped. Much later on (like about 4 months later), I had taken my things to my wingmans HUGE basement and we started paint works there.
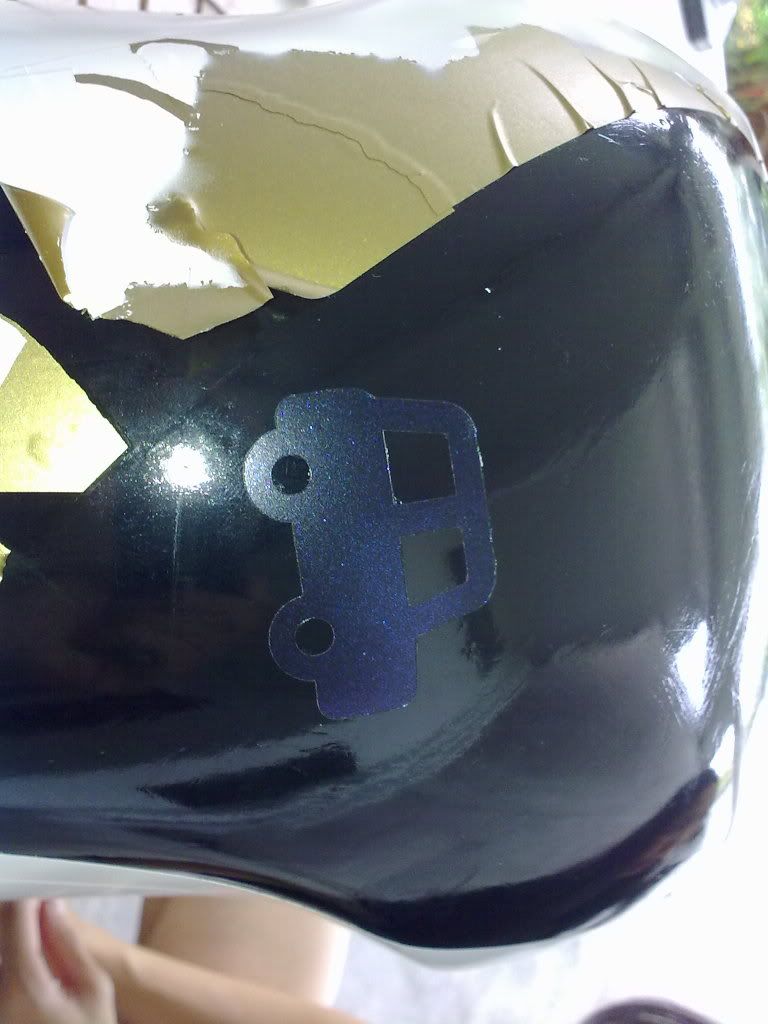
Once all the undercoat was done, it was then off to Remus's Motorsports Playground for mask works. Since it was Chinese New Year here in Malaysia and me being a chink, I took a week off and so did Remus. But true to his word, Remus made the masking happen and the masking was born in the middle of a Friday night. Poor Playground worker though, he had to re-mask the tank at least 3 times.
Anyway, paint work went on and things were not too shabby except the fuel cap. When I started the paint works, I used a known brand of spray paint. Sadly, the quality is no longer as good but I didn't know that till later. I had painted the fuel cap with that brand but for the rest of everything else, I had used a different brand that compressed automotive paint into aerosol cans. After the paint works were done, the first item to be unmasked was the fuel cap. Unfortunately, the paint and the masking were both in a tug of war match with each other, sad to say, the paint lost and everything came off with the masking. So, temporarily the fuel cap was repainted white with no designs.
Being appreciative of what Remus had done for me, I stamped my (what is now lovingly called) Ironman tank (because the front of it looks like the Ironman mask) with the playground car in "Silhouette" paint. This is a lightly tinted flaked clear paint.
Most of the paint work was done with a Negative masking. A lot of people actually asked me, why did you do a negative masking? Wouldn't it be easier and cheaper to have the base painted the color your wanted then stick the mask one and spray the rest of the items? Well, yea. But there are 2 reasons why I did it that way. I have had bad experiences with positive masking before. As I took it off, it ripped off a lot of paint and also left very bad textures on the masked areas. Maybe back then it was due to the paint I was using but it scared me. Another reason would be because the look is actually slightly different. I don't know how to explain it, but positive masking and negative masking of the same design gives off a very different effect to your paint job. Absurd? Try it. You will see.
The Playground Car
The TankThe Rear Fender (My Pride And Joy)Paints I had used:
- Anchor Base Silver
- Nippon Aerosol Black
- Nippon Aerosol White
- Nippon Gloss Clear
- Aikka Silhouette Blue
- Aikka Clear (for finishing)
Paints I had wasted money using:
Anchor Black(like 10 cans dammit)Anchor White
By Vy
Wednesday, February 9, 2011
Credits:
First up, sorry for the lack of posts, if anyone is even reading this.
By Vy
In case you guys are not aware, it's a long holiday for us Chinks (Chinese peeps) in Malaysia due to the Chinese New Year celebrations and I have been away where internet connectivity is a rare sighting (not really.. just for my parents).
Have too many things to do since I have come back to the big city so I cant get my brain up and running to blog about my bike much yet. So I just wanted to make this post quite simple and thank those who have contributed in their own way to making this bike (almost) happen (its not done yet.. and we're cutting it close).

The Shirtless dude is my pops dats d only pic i have of him
First up, I would like to thank my pops. If it weren’t for your fondness is modifying things, I would not have even started anything like this. Although you didn't do much in cars and bikes, the basics of paint, power tool control and sitting there loaning me all your stuff was kinda cool.

My lil wife REALLY lil
Next up, my wife. For whom without, I would never be anything or anyone if it weren’t for you. And still, you find the time to indulge me in my DAMN expensive hobbies. Sometimes I don't know if I should ask WHY THE HECK DO U?? but today I just wanna say thanx babe.

Mr B, lookin like some triad dude but he has a heart of butter
Another great thank you would be from Mr B from Bees Knees Bobber. A great friend of mine whom I met by wanting to buy his car at first. In the end we became very close friends. A man who is very deep when he speak or thinks, a man who has few words and hates online chats, he's a very good buddy of mine. We have so much in common it scares me, but he has always been there to listen to me bitch about how I'm unhappy about the world. Thank you lots dude.

My Main Man Ray
There is also Ray and his brother whom had taken the time to listen to my mad ideas about the bike when the whole world didn't want to listen and tried to make me build what I didn't want. It was Ray and his brother who could see where I was heading and could picture the whole bike even before they saw it. If it weren’t for these two blokes, the bike would still be rotting in the bike park where my condo is right now.

Anson, being.. well.. anson..
Anson!! My friend from the car accessory part of my life. A very talented young man whom I met a few years back when I was looking to buy an amp for my car. He has a great still with a soldering iron and circuits. This young man will be the one who has been assigned to create my custom tail lamps, supplying all the lighting for my car AND setting up my barbecue kit for my bike… (yes.. I said barbecue kit)

Aliffffffff.... couldn't link his FB account. not sure why
Alip/Aliff. My skilled mechanic whose garage my bike is in right now. doing choppers as a side job and teaming up with Ray as "Hand Made Garage" Alip had shown mixed feelings when we had provided him with the task of building my weird bike. Although he is busy with his day job, he still somehow finds time to tinker with several bikes at a time. Alip is the hands of this operation and it is with him where this project flies or fails.

Remus. My Artwork dude. any stickers i have, i now go to him only!
Remus of Motorsports Playground. I first met Remus after talking him for some time. I had seen his branding everywhere when I go to car events all around Kuala Lumpur and found out that he owned the "Playground" a great concept where he does stickers, car simulators and is knee deep in anything motorsports related. He has a great personality and though constantly busy, he still finds time to be polite and helpful. My masking is currently being done by him and his crew.
So there it is, generally all the major players in the bike build. I will try to crack my brain to update more on what had happened previously and try to make it before the unveiling of the bike (hopefully on time).
By Vy
Subscribe to:
Comments (Atom)