
First off, I would like to state that I am not a
professional trainer, nor a certified mechanic (then again who is in
Malaysia?). The following information shared are of things I have learnt in my
many years of riding and crashing (yes, I wipe out a lot). Think of it as me
falling and making mistakes so you don’t have to.
There are so many different types of advice out there on
how to ride... a lot of them are bad advice. Some of them are good.
In my opinion, there are 2 types of riders (idiots,
squids, road bullies etc are available in those 2 categories too); Instinct
riders and Technical Riders.
Instinct riders:
These are the type of riders who figured out how to ride
on their own. Most of them do technical riding without even knowing it. And these
(like me) will learn the hard way by crashing to realize they made a mistake. The
thing about this type of rider is that we all start from here. We get our
instinct riding skill from our bicycle days. But some will stay in this zone
until they retire and some will move on to technical riding.
Technical Riders:
These are the type of riders who will “ascend” from being
instinct riders. These are the people who realize that there are more things
they can learn to ride better, identify the technical terms of the things they
are doing when they were instinct riding and improve on it.
Example of “ascendance”
You take a corner, a technical person would know that the
rules of cornering is that to turn, the bike MUST counter steer if it goes
above 40kmh. There are no Ifs or buts about it. Yet an instinct rider will do
it without realizing that he/she did it. A technical rider will realize “hey, I’m
counter steering”, do more research about it, understand that he/she can
actually turn at higher speeds and bank lower. Then will move on to
understanding racing lines and weight shifting with a smooth throttle roll
on/off. If we could do an overlay of the rider before and after he realized the
potential of getting a better turn, the instinct rider he used to be would have
been left behind.
I can’t tell one all the skills one has to learn because
there are too many and a lot of them have become part of my instincts of muscle
memory. But I will do my best to cover as much as I can.
I have spent many man hours watching “how-to” videos and I
am able to conclude that 2 videos best suit all riders.
1. Ride
like a pro
2. Twist
of the wrist 2
To be very good, one should master both videos. Although one
seems to focus on choppers/cruisers (RLP) and one on superbikes (TTW2). Each one
has their specialties.
Ride Like A Pro
This should be the first video all bikers should watch. It
doesn’t matter what type of bike you use, if you are an advanced rider or a
beginner. The sequence of training must be followed as each skill you learn
will be used in the next sequence. If you already know certain sequences, then
you may move forward.
These are skills best used in day to day traffic.
Twist of The Wrist
2
This is would be good for those who have mastered RLP and
would like to improve on the skills they have to go faster. They also explain
the common rider errors and panics riders get. They also (without realizing it)
explain how to be more comfortable while riding long distance. Again, although
both use different base bikes, I found these apply for all types of bikes.
Biker Basics (I
can remember right now)
Clutch:
The clutch is NOT an On/Off switch. (BUT IT IS!)
The above statement is quite confusing right? That’s because
both are right.
When the clutch isn’t an on/off switch:
The clutch is a wonderful thing. Ppl talk about bite
points of the clutch. What you must understand about the bite point is this:
1. A
clutch bite point is the point when the clutch creates enough friction to move
the bike
2. How
much bite you apply to your clutch (by controlling the clutch lever) reduces or
increases the transmission of % of power made by the engine to the wheels.
3. It
is with the transmission of power that ensures the bike stands up.
It is realizing this that you can understand how limiting
or adding power to your rear wheel with the clutch will allow balance and
proper movement.
Also, with the clutch, it is easier to reduce jerking. If
your bike starts to jerk but you don’t want (or cant) change gears yet, then
you float the clutch. So it limits the amount of power transmitted and the
jerking is absorbed by the clutch.
When a clutch IS an on/off switch:
When you are cycling through gears:
-
If you are on a highway, quickly shift and drop
the clutch like a hot coal.
-
This will ensure maximum bite and no lags in
power.
When you need to stop:
-
The clutch is linked to the rear wheel, braking
with the clutch ON is never gonna help you stop.
-
Ensure you depress the clutch (you can say how
ugly it looks… get it? No? *sigh* okay) then you will find the rear brakes much
more compliant.
Clutch work is never easy. Just do your best and practice
every day.
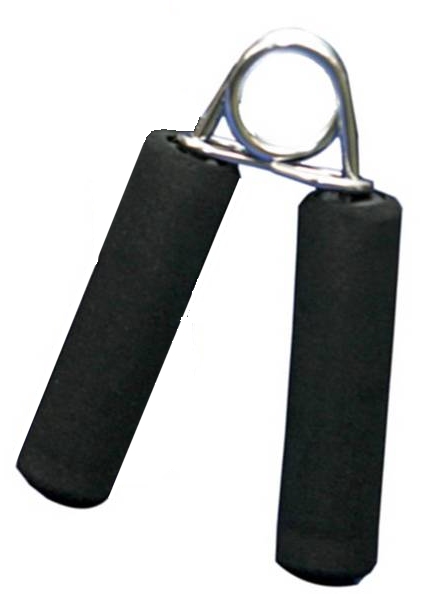
I always advise my friends to practice by using hand grip
strengtheners. These will have to be used the opposite way of how they usually
are. Instead of slowly squeezing them in, you want to squeeze them in and
slowly let them out. Do this every day until your launching on your bike
becomes stable.
Brakes:
Brakes are a simple thing… you have one in the front and
one in the back.. wanna stop? Step and squeeze as hard as u can. Right? WRONG!
There is so much more to brakes than just stopping. Applied
in the right time, brakes can make you go faster. Even when I raced cars I always
said “sometimes, if you wanna go faster, you need to slow down”.
Too much braking:
1. Is
there such a thing? YES! You brake for everything! i.e. you see a car at a
junction MILES away from you, when you are about to turn (usually because you
are afraid of the turn), when you think you are going too fast… etc
Causes of too much braking can be due to:
1. Fear
2. Not
used to your brakes
3. Brake
checking
4. Going
too fast (so you think)
How much is too much?
The next time you are on your bike, brake at a traffic
light and look at what you are doing:
How many fingers are on your brake lever? You should have
maximum 2 (for disk brakes). 1 finger if you are just slowing down, 2 if you
are stopping.
Are you stomping on your rear brakes? If yes, ease up. There
are times to step harder on the rear and times to pull harder on the front. If your
clutch is on, stomping on the rear brakes is as useful as going to a McDonalds
looking for healthy food… its there… but not really(that’s me trying not to
give dirty metaphors).
70/30 braking:
Some say 70/30, I have heard 60/40, 90/10, 100/0,30/70,
20/80, 10/80 + 10% hopes and dreams…
All these numbers does not matter when you are really out
there… there are no real numbers in real life and even if they are really
there, they ae just guidelines and all depend on the situation.
Leaving engine braking out (in case you ride a scooter
& it’s complicated to say when to do it), here are some guidelines I like
to use:
1. Front
heavy
2. Rear
heavy
3. Equal
4. Rear
+ power
5. Front
+ power
Examples:
Front Heavy:
Front heavy means braking with more pressure put on the
front than the back. This usually applies for dry roads and riding straight or
will a higher banking angle when turning (not too much lean).
Rear Heavy:
This means the opposite. More pressure on the rear (with
or without clutch pulled). This is useful for rain/damp roads, sandy roads,
corners with a lower banking angle (you are leaning more).
Equal:
Both front and brakes are applied with more or less equal
amount of pressure. This is very commonly used for heavy rain situations. At this
point, your front and rear brakes are practically screwed because of over
lubrication and the lack of an optimum temperature for your brakes to function.
Braking must be linear and firm.
Rear + Power:
This is when it’s not about slowing down, it is about optimizing
your brakes to do your bidding:
1. This
is good for beginners and sharp narrow turns. Pressure to the rear brakes
limits the power to the rear wheels
2. It
is also useful when you are sifting through traffic or are in a slow traffic
situation. As the power is applied together with the brakes, your bike will
want to stand up.
Front + Power:
This is more for the advanced biker, usually used for
late braking before entering turns. This stabilizes the bike when going slow as
well but is very risky with a high chance of locking up the front brakes.

Tank Squishing:
I honestly don’t know what it’s called. But I call it
tank squishing. This applies for both cruisers and sports bikes. It is the act
of squeezing your tank with your thighs.
Why:
What this does is it uses your lower body to anchor down
to the bike thus giving your hands the freedom to be loose and thus better
control your bike. On highways however, I recommend the old switcheroo… just
alternate so you don’t get tired too fast.

Turning:
At 0 to 25++kmh, the bike will turn left when you turn
left and right when you turn right.
At 30++ the bike will turn left when your handles turn
right. This is called counter steering.
When people tell you that the bike will turn left if you
lean left, they are morons. If your triple tree is locked to a point where it
cannot freely move, go for a ride let go of the handlebars and try leaning. Call
the ambulance before you do this though.
If one says it works, that would be because the handles
are set to move freely and the bike being designed the way it was, it will try
to counter steer itself thus some feel that the bike turns when you counter
steer.
I tend to like to teach my friends the “chin pointing”
method of turning:
This is where you point your chin to the direction you
wish to go. The sharper the turn, the more you will need to lean. Lean at a 45
degree angle towards your handlebar (i.e. if you want to turn left, lean
towards your left grips).
The science of this is that when you lean your chin
towards the handle bar, your hand will be creating a forward pushing motion on
the handles thus causing it to counter steer. It also shifts the body weight to
the side of the motorcycle you wish to turn in to.
Weight Shifting:
When cornering, it helps if you actually lean into the
side where you wish to turn. A lot of people look at MOTOGP and think you have
to dangle off the bike. That’s crap! You don’t have to hang like and ape off
the bike, just a little help to move the bike to the side and that’s all you
need. I always advise all my friends to turn your knee out 90 degrees
(regardless what bike you are riding) as that will shift your weight onto the
pegs you wish to turn to. As the bike is banking, your other leg should still
be tight on the tank to hold your body from sliding.
Eyes On The Road:
The general rule of riding: always keep your eyes on the
road. The problem with most people is that when they look at something, they
have to focus on it. i.e. if you look down the road, you will focus on a tree
or a car. Once you do that, your bike will follow the bike or car or tree
instead of the road. If you are in your office, stand up and look straight. You
will be forced to focus on maybe someone’s cube or chair or someone's ass (which
is usually the case you pervs!). What you need to do is see EVERYTHING. The human
eye can comprehend a lot of things and perceive a lot more than what we can
process consciously. The thing is that SUBCONCIOUSLY, we can process even more.
These are the things that your mind sees, feels is unimportant and dismisses
them. A good example: when riding or driving to work, do you remember all the
cars you passed? I’m sure you don’t, but I’m sure you would have done some
minute adjustments to avoid them and things.
Practice:
You can do this anywhere! Stand up at your office, look
far down, do not focus on anything, start walking and keep your eyes looking
far and try to avoid stuff BUT DON’T FOCUS ON IT!
Then when you are good at it, get on your bike, scatter
tennis ball halves everywhere and avoid them with your bike while looking far.
This will train your mind to pick up and take the
appropriate action without storing it in your memory.. Because for your body,
it takes more effort to remember than to just deal and forget.

Launching:
This is an addition to clutch control. New bikers find
the clutch and throttle a problem. They are afraid of the clutch because they
may end up poping a wheelie. My advice for new bikers:
-
Rev at 3k+++ (don’t go over 5k)
-
Slowly release the clutch while maintaining the
revs
-
Upon bite point, keep releasing and compensate
the revs accordingly.
Adjustments:
Contrary to popular belief, the clutch and throttle are
not properly adjusted out of the factory. There are no “one size fits all” adjustments
for bikes.
Clutch: adjust
the clutch so that bite point is to your preference. The only “wrong” setting
for this is if the bite point is set all the way up and there is no free play
on the clutch. We don’t like this because when this is done, you may not be
releasing the clutch 100% and may cause damage to your plates.
Throttle: too
much free play on the throttle can cause issues like a blippy inconsistent rev
and if you want to be an anal “racer” you lose milliseconds in your shift. Adjust
your throttle for 1-3mm of free play. Turn your handle all the way left and
test the free play, if there is some then good. Turn the other side and check
again. If you turn and it is tight, loosen it up a little.
These few points I have mentioned is all I can think of
right now, please do comment on other things you wish to know about your bike
or things I may not have covered that is also not in the videos, please feel
free to drop a comment and I will be sure to answer you.
By Vy


